Have you ever wondered how our ancestors were able to create intricate metal objects that still manage to impress us today? Metal casting has been around for generations, evolving significantly over the years and offering immense versatility in manufacturing.
Modern techniques have led to metal castings that boast mechanical properties almost on par with parts created by other methods. In this guide, we’ll explore an overview of metal casting, main types of metal castings, advantages and disadvantages of metal casting, applications of metal castings, and much more.
Get ready to explore metal casting and learn how this age-old technique continues to shape the modern world.
Metal Casting Process Simplified
In essence, metal casting is a process of pouring molten metal into a mold, which is a negative impression (or female replica) of the desired casting shape. As the Liquid metal cools, it forms the shape of the mold. Once solid, the casting is removed from the mold for further processing. The mold can be made as a single-use mold or a permanent mold.
The metal casting comes in handy when creating complex shapes with intricate cavities and irregular curvy profiles that could be challenging to create using machining processes.
Choosing which casting process to use depends on factors like the quantity and quality required, the material of the casting, and so on. Each casting process has its unique benefits and drawbacks.
Understanding Casting Yield
The casting yield is the difference between the weight of the molten metal poured per casting and the net weight of the finished casting after removing any runners, risers, or projections.
To calculate casting yield, use this formula: Casting Yield (percentage) = (Weight of Casting ÷ Weight of Poured Metal) x 100.
For example, if the casting weight is 100 kilograms and the weight of poured metal is 125 kilograms, then the yield is 80%. This yield highlights the amount of scrap generated during the casting process, in this case, 20%.
The Basics of Making a Casting
Before we dive into how to make a casting, it is crucial to understand what pattern and mold mean.
Pattern: is a three-dimensional replica of the required metal casting, and it can be made from various materials such as wood or metal. The pattern is used to form the mold.
Mold: is the negative (cavity) of the pattern. Making a mold involves placing the pattern in a hollow metal box and packing it with foundry sand or other suitable materials. Upon removal of the pattern, a mold cavity is left behind.
Manufacturing a Casting
A pattern is made and used to form a mold in the foundry sand to produce a solid metal casting. Once molten metal is poured into the mold and solidified, the desired shape is formed. If you need to create a hollow casting, a core must be placed within the mold before pouring in the molten metal.
Want to experiment a bit to understand molds and patterns better?
Pack a small box tightly with clay mixed with a bit of water. Find a small metal or stone doll – this will be your pattern. Press the doll into the clay and remove it carefully, leaving behind a cavity that mirrors the doll. Melt some candle wax and pour it into this cavity.
Once the wax solidifies, you can remove your duplicate wax doll. This simple experiment gives a practical understanding of how molds and patterns work in metal casting.
Type of Casting: Different Types of Metal Castings
Different castings can be broadly categorized into two main types:
- Expendable type
- Non-expendable type
The distinction between expendable and non-expendable metal castings lies in their mold uses. With expendable metal castings, the mold is discarded after the casting extraction (e.g., sand casting molds or investment casting shells). In contrast, non-expendable metal castings reuse the mold or die after extracting the casting (e.g., die casting or gravity die casting).
However, the pattern used to create sand-casting molds or investment-casting shells is reusable.
Expendable Mold Castings
Within the expendable category, there are several types of casting processes:
- Sand casting process
- Plaster casting
- Ceramic mold casting
- Shell mold casting
- Investment casting
Non-Expendable Mold Castings
The non-expendable casting category also includes multiple casting processes:
- Die casting
- Gravity Die casting (permanent mold casting)
- Low-pressure die casting
- Centrifugal casting
- Continuous metal casting
By understanding the differences between these types, you can choose the most suitable casting method based on production volume, required casting quality, and the material being cast.
A. Expendable Metal Castings
1. Sand Casting
The name sand casting indicates that the mold is prepared by filling the foundry sand tightly around the pattern in a mold box. The technology of sand casting has improved over the period, but the principle remains the same. You can use sand casting to make solid castings and castings with hollow cavities, limited intricacy, and other features.
As the name suggests, sand casting uses foundry sand to create a mold around a pattern within a mold box. Although the technology associated with sand casting has evolved, the essential principle has remained unchanged. Sand casting helps produce solid castings and those with hollow cavities, minimal intricacy, and other features.
The process of sand casting can be broken down into several steps:
Step 1: Making a Pattern
Create a pattern based on the desired shape and size of the casting. The pattern material can be wood, metal (for example, aluminum), or another suitable material. Solid casting requires only a pattern while producing hollow shapes requires a pattern and a core box. Hollow inner shapes are cast with the help of cores. The second type of pattern will have locations for placing the cores.

The overall size of the pattern will account for the shrinkage that occurs when the molten metal solidifies into a casting. A draft angle is also incorporated for ease of extraction from the mold. Patterns are typically constructed in two halves.
Step 2: Making the Sand Mold
Sand molds are prepared in two separate halves. Two mold boxes (hollow rectangular metallic boxes) are used, with the bottom mold box termed a “drag” and the top mold box called a “cope.”
The foundry sand used for molding is a mixture of sand, binders, and additives. The sand mix is tested for its properties before being used for molding. The lower half of the pattern is centrally placed in the drag, and the foundry sand is poured over it and compacted manually or on a vibrating platform. Excess sand is removed by scraping it off.
The drag is turned upside down, and the top half of the pattern is placed on the bottom half (using locators for the correct pattern alignment). The top mold box (cope) is placed over the drag and locked in place. The runner and riser are placed in the cope at their designated locations.

Foundry sand is poured from the top and compacted, and excess sand is removed by scraping. Vent holes are created using a thin metal rod to allow the escape of steam and gas during pouring and solidification.
The cope is turned upside down, and the pattern, runner, and riser are removed from the cope and drag. The mold is inspected, and any damages are corrected by hand. If the casting requires cores, the dried cores are placed in their locations. The mold is then dried naturally or in an oven.
Step 3: Pouring the Molten Metal
The assembled drag and cope, complete with cores, are positioned at a convenient location. The molten metal is transferred from the furnace and poured into the mold’s runner. Pouring ceases when the molten metal exits the riser.

The pouring process should be as quick as possible. Gases and steam generated during pouring escape through the pinholes and the porous sand.
Step 4: Casting Extraction
Once the casting has cooled, the mold is broken open, and the casting is extracted. The sand can be recycled and should not be thrown away.
Step 5: Finishing the Casting
The extracted casting will have the runner and riser attached to it and may contain sand inclusions and surface irregularities. The runner and riser are cut from the casting, and the casting surface is fettled or sanded to remove sand inclusions and smooth out the surface. The casting undergoes sand or shot blasting to improve the surface finish if necessary.
Step 6: Seasoning
Castings may require seasoning to remove internal stresses. This can be done through natural seasoning by leaving the casting outdoors for several days or using a heat treatment furnace.
Step 7: Testing
The casting is tested according to the directions provided in the drawing. The surface finish and geometric accuracy of sand castings depend on the sand type and the molding method. The molding method can be manual or mechanized, the mechanized method is used for large batch production.
Vacuum molding is a method of sand molding in which the sand does not require a binder. Instead, the sand is compacted in the mold box by applying a vacuum to it.
2. Plaster Mold Casting
This method is similar to sand mold casting, but the casts produced typically have a finer, smoother surface finish. The plaster mold casting is made in the following steps.
1. Pattern Creation: A metallic pattern, commonly made of aluminum or cast iron, is created to reflect the geometry and size of the needed casting. Necessary allowances are added.
2. Preparing Mold: The process of mold preparation using the drag and the cope is similar to sand casting, except that plaster slurry (a mixture of gypsum and water) is used instead of foundry sand. The runner and riser are positioned in the cope before pouring the plaster slurry.
3. Mold Drying: The molds (drag and cope) are dried and ready to pour molten metal (similar to sand molds). Holes are drilled in the cope to allow steam and gas to escape during the casting process.
The downside of plaster molds is that they can only be used for casting low-melting-point metals like aluminum alloy.
3. Ceramic Mold Casting
Ceramic mold casting is accomplished in much the same way as sand and plaster mold casting but uses a ceramic slurry to form the mold instead of sand or plaster. Most often, metallic patterns are used.
Unlike plaster molds, ceramic molds can withstand high temperatures, so they can be used for casting metals with high melting temperatures, such as cast iron, steel, and their alloys.
4. Shell Mold Casting
Shell molding is another casting method generally used for creating thin-walled metal casts. The shell mold casting is made in the following steps:
1. Pattern Creation: As with other methods, a metallic pattern (made of aluminum or cast iron) is created according to the geometric shape and size of the needed casting, adding the necessary allowances.
2. Preparing Mold: The metallic pattern is heated to around 450° F and placed on a metal flask filled with a mixture of sand and resin.
3. Forming Shell: The metal flask is inverted so the sand and resin mixture falls onto the hot pattern. This creates a thick layer on the pattern that cures due to the heat.
4. Removing Loose Particles: The flask is turned upside down again, and the loose sand particles fall off the pattern.
5. Curing: The pattern with the shell is cured in an oven. After curing, the metallic pattern is removed, leaving the thick shell intact. Two shell halves are produced to complete the shell mold.
6. Assembling Shell: The shell halves are assembled and placed in a metal flask, and sand or metal shot is filled in to provide shell support.
7. Pouring Molten Metal: Molten metal is poured into the shell mold and cooled. Once cool, the casting is extracted by breaking open the shell.
While shell-molded casting can deliver better mechanical properties and finishes than sand casting, it can be costlier.
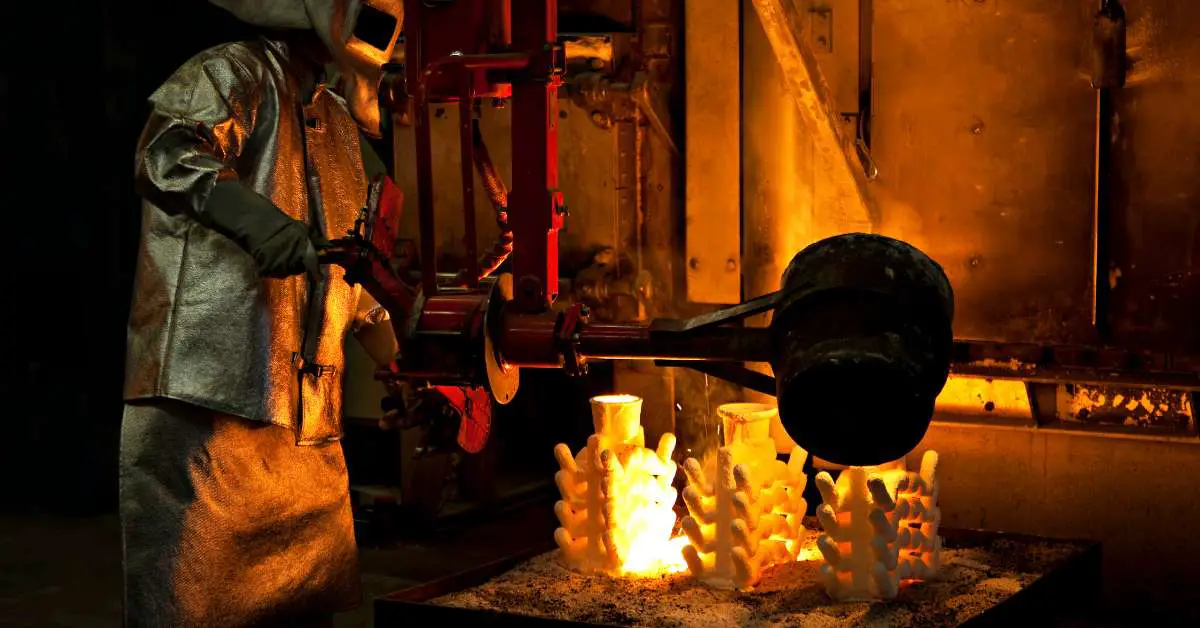
5. Investment Casting
Also known as lost wax casting, this method involves melting off wax patterns used to prepare a ceramic shell to create a cavity where molten metal is poured.
Investment castings have good geometric accuracy, surface finish, and precision. They are highly repeatable and can be used with minimal machining. Both ferrous and non-ferrous metals can be cast. However, there are some downsides: high tooling cost, increased cycle time, and difficulty producing hollow castings.
Investment castings (lost-wax casting) are used across various sectors, including but not limited to the gas turbine, chemical, petroleum, and food processing industries, as well as in the production of medical instruments, engineering machinery, automobiles, home appliances, etc.
Steps in the investment casting process are listed below:
1. Create a Master Die: A master die is manufactured specifically for creating wax patterns. This metallic die is called ‘master’ due to its reusability for consistent wax pattern production. When designing the master die, allowances for wax and metal shrinkage are considered to guarantee the geometric shape and size of the final casting.
2. Create a Tree of Wax Patterns: Patterns are produced using the master die.
3. Wax Tree Creation: Several wax patterns are mounted to a wax sprue, creating an arrangement resembling a tree. The sprue serves as a conduit for the molten metal once its surrounding wax is melted away to create a ceramic shell. A minimal amount of heat is typically applied to secure the wax patterns to the sprue. Careful consideration should be given to the number of wax patterns assigned to each tree, keeping in mind handling safety measures.

4. Creating the Shell Molds: The tree, composed of wax patterns, is immersed in a ceramic slurry and subsequently coated with sand stucco before drying. This procedure is repeated multiple times to achieve the desired shell thickness, which can be up to 15 mm and fluctuates depending on the weight of the casting. The dried, thickened ceramic mold, known as the ‘investment,’ will be robust enough to contain the molten metal.
5. Wax Removal: The wax pattern tree is placed in a furnace to melt and evacuate the wax, which leaves a hollow ceramic shell.
6. Pouring the Molten Metal: The hot shell is taken up for pouring. If there is a delay, the cold shell must be pre-heated in a furnace to remove leftover wax and moisture. The ceramic mold, or the “investment,” is placed in a sand container. Molten metal is poured into the ceramic shell through the sprue.
7. Casting Extraction: After the metal is cooled, the shell is broken to extract the casting.

8. Post-Casting Finishing: The finishes to the casting are done by removing the sprue and gate, then sanding or shot blasting.
9. Testing: The castings are tested as per the specifications in the drawings.
B. Non-Expendable Metal Castings
1. Die Casting
Die casting uses a reusable mold (metal mold or die), to produce numerous castings. It is typically employed for nonferrous castings like aluminum and its alloys. As the molten metal is injected into the die under high pressure, this process is also known as high pressure die casting (HPDC).
The die is divided into two sections: the stationary front section, called the cover die, and the mobile rear section, known as the ejector die. When assembled (clamped), the joining line of these two sections is identified as the parting line.
In typical machines, the die and attachments for clamping, de-clamping, lubrication, and cooling are mounted on the left side. The right side houses the facility for injecting molten metal under high pressure. Die-casting machines are usually horizontal.
Die casting offers several advantages: superior surface finish, excellent mechanical properties, minimal die maintenance, speed and economy, and high repeatability. However, the high cost of dies and die-casting machines could be significant drawbacks.
Despite these costs, die casting is heavily utilized across various industries. For instance, the auto industry uses die-cast parts like carburetor bodies, fuel injector components, hydraulic brake cylinders, and aluminum cylinder heads. Other applications include brass connectors, valve bodies, and faucets used in domestic and industrial plumbing.
Types of Die Casting Machines
Die-casting machines can be categorized into three types:
- Cold chamber metal die-casting machine
- Hot chamber metal die-casting machine
- Vacuum die-casting machine
These machines are equipped with cooling systems for quicker solidification of the molten metal.
Cold Chamber Die Casting Machines
Cold chamber machines are useful in casting nonferrous metal alloys with higher melting temperatures, such as aluminum and zinc alloys with high proportions of aluminum, copper, and magnesium.

Such alloys cannot be melted in hot chamber die-casting machines since it is unsafe. The molten metal has to be brought from an external furnace and poured into the injection chamber of the machine.
Hot Chamber Metal Die Casting Machines
Hot chamber machines are ideal for casting alloys with lower melting temperatures and excellent fluidity, such as zinc, lead, tin, and magnesium alloys. These molten alloys do not erode and affect the metal pot and the metal injection parts coming in contact with it. The machine includes a small furnace for preparing the molten metal.

Compared to the cold chamber machine, the hot chamber die-casting machine has a shorter cycle time per casting due to the molten metal’s location inside the machine.
Vacuum Die Casting Machines
The vacuum die-casting machine is a modified version of the hot chamber die-casting machine, with distinct configuration and casting mechanics differences. In this machine, the molten metal bath is positioned on the left side, while the die, along with its clamping and de-clamping mechanisms, is located on the right side
In contrast to injection-based die-casting techniques, which force molten metal into the cavity, vacuum casting machines employ a vacuum pump to draw the molten metal into the die cavity. As the vacuum is applied, the molten metal is pulled from the bath and fills the die. The vacuum is maintained until the molten metal solidifies, forming the desired casting.
Die Casting Process Cycle
The Die Casting process is executed in several sequential steps:
Step 1: Preparing the Die Halves (Clamping)
Initially, the two sections of the die, also known as die halves, need to be thoroughly cleaned and lubricated. After applying a protective coating via lubricant, which also easily removes the final product, the two halves are clamped together securely. The hydraulic force involved in clamping depends on the characteristics of the molten metal and the injection force necessary for the process.
Step 2: Molten Metal Injection
After securing the die, the next step involves injecting molten metal at high pressure, possibly reaching up to 20000 PSI, into the die cavity. This method is called a “shot.” To avoid premature solidification, the metal is filled within a fraction of a second, a duration referred to as the injection time. The pressure is sustained until the molten metal cools and forms a solid cast.
Step 3: Cooling and Solidification
After injection, the molten metal is allowed to cool within the die. The cooling duration varies according to the die complexity and the thickness of the casting. The injection pressure is sustained during this phase to ensure proper shape formation.
Step 4: Casting Ejection
Once the molten metal has completely cooled and solidified, the ejector die is drawn back, activating the ejector pins. These pins apply a slight force to free the casting from the die. An operator then collects the casting.
Step 5: Trimming and Preparing for the Next Cycle
After removing the casting from the die, any leftover metal from the flow channels or flash formed at the parting line must be trimmed. This pruning process can be performed either manually or by employing trimming dies. The excess metal, or scrap, is recycled. The die then proceeds to be cleaned and lubricated, preparing it for the subsequent cycle.
This outlined process can be applied to both cold and hot chamber machines.
2. Gravity Die Casting Process
Gravity die casting, also known as permanent mold casting, is a suitable process for low to medium-quantity castings and offers better quality than sand castings in terms of geometric accuracy and surface finish.
The metallic die consists of two halves: the front half is fixed, and the rear half is movable. When both halves are clamped together, they create a cavity in the desired casting shape. The machine can be constructed horizontally or vertically.
In the clamped condition, molten metal is poured, with the pouring height determining the applied hydrostatic pressure. Operations such as cleaning the die, lubricating it, pouring the molten metal, and opening the die can be done manually. A cooling system for the die may be incorporated to solidify the molten metal.
Due to the manual operations, the cycle time per casting can be longer. However, the simple construction of the machine makes casting more affordable.
Gravity die casting offers better grain structure, surface finish, geometrical accuracy, mechanical properties, and fewer casting defects when compared to sand casting. However, metallic dies are expensive and might not be suitable for intricate shapes.
3. Low-Pressure Die Casting (LPDC)
Low-pressure die casting is a variation of permanent mold casting featuring a vertical construction. The two halves of the die (the fixed lower die and the movable top die) are mounted on the top portion of the machine, and the molten metal enters the die through the lower half. The die halves are cleaned, lubricated, and clamped together to form the die cavity.
The bottom part of the machine contains a ceramic pot with a refractory lining, and an opening in the machine allows the pouring of molten metal into the ceramic pot. The ceramic pot can be refilled when it becomes empty. A refractory-lined riser tube connects the molten metal in the ceramic pot to the lower die.
When air or gas (0.3 to 1.5 bars) is allowed into the lower chamber of the machine, the molten metal rises through the tube and fills the die cavity. The air or gas pressure is maintained until the casting is formed.
After the casting is formed, the air pressure is removed, and the excess molten metal returns to the ceramic pot. The top half of the die moves up, and the casting is ejected. The die cavity is then cleaned, lubricated, and clamped for the next casting.
The advantages and disadvantages of low pressure casting are similar to those of gravity die casting. Additionally, when air is used, the oxygen in the air can react with the molten metal. This process is employed to produce automobile wheel rims and similar items.
4. Centrifugal Casting
As the name suggests, centrifugal casting uses centrifugal force to distribute the molten metal within the mold, forming the casting. The rotating mold creates the centrifugal force, eliminating the need for a gating system for molten metal entry. The centrifugal casting machine can be either horizontal or vertical.
This process is used for producing cylindrical hollow castings. Vertical centrifugal casting is employed when the diameter of the casting is more important than its length.
The process of centrifugal casting can be broken down into several steps:
Step 1: Application of Ceramic Slurry
First, apply a layer of ceramic slurry to the inner walls of the metallic mold. After application, allow the slurry to dry and then bake it.
Step 2: Rotation of Mold
Now place the mold on its horizontal or vertical axis. Rotate the mold at a speed designed for the process, which can go up to 3000 rpm.
Step 3: Pouring the Molten Metal
After setting up the rotation, pour the molten metal into the mold. Due to centrifugal force, the metal spreads and distributes evenly across the mold. Maintain this centrifugal force until the molten metal solidifies into the desired casting shape.
Step 4: Stopping the Rotation
Once the molten metal solidifies into the casting, stop the rotation of the mold.
Step 5: Extraction of Casting
After the rotation stops and the metal is solid, carefully extract the casting from the mold.
Step 6: Removal of Impurities
Lastly, remove any impurities present at the center of the casting. This process can be done through machining or sandblasting, ensuring a clean and defect-free casting.

Advantages of Centrifugal Casting:
- Large-size castings can be produced.
- A wide variety of casting compositions is possible.
- The casting yield can be closer to 100% in many cases.
- Bi-metallic pipes can be created.
Disadvantages of Centrifugal Casting:
- Only suitable for casting metals with alloying elements having nearly equal densities.
- Centrifugal casting setup requires a high investment.
- Skilled laborers are needed.
5. Continuous Casting
Continuous casting can be compared to extruding square or rectangular bars. The difference is that, in continuous casting, molten metal is poured continuously into a water-cooled copper mold, and the solidified casting is continuously moved out of the mold by a roller conveyor system.
The molten metal is poured into a funnel, which controls the rate of pouring into the mold and, consequently, the casting rate. The funnel pours the molten metal into the copper mold, which can have a square, rectangular, or circular cross-section.
The continuous flow of water cools the walls of the mold. The outer skin of the casting cools and moves out on the conveyor rollers. The metal solidifies but may still be internally pliable (not fully solid). The softness of the cast metal allows it to bend and flow out of the mold horizontally. As the casting moves out on rollers, it is continuously sprayed with water to complete the solidification process.
Continuous casting can produce square, rectangular, or circular cross-sections and can be cut to the required lengths. It is commonly used to create continuous lengths of billets and blooms.
Advantages and Disadvantages of Metal Castings
Advantages
1. Complex Shapes and Intricate Details: Metal casting can easily produce complex shapes with intricate cavities and irregular profiles that are difficult to manufacture using machining processes.
2. Suitable for Various Production Quantities: Metal casting is versatile and accommodates single pieces, batch quantities, or even mass production. Various casting processes cater to different requirements.
3. Improved Surface Finish: Plaster mold and ceramic mold castings offer the benefits of sand casting while providing improved surface finishes.
4. Thin-walled and Detailed Castings: Molten metal has excellent fluidity, which allows it to flow and fill even the smallest corners of the mold cavity, resulting in thin-walled and detailed castings.
5. Consolidation of Components: Metal casting can replace weldments or subassemblies with a single metal piece, reducing assembly time and costs.
6. Flexible Weight and Material Options: Metal casting can produce components weighing a few grams up to several tons, and almost all metals can be cast.
7. Net-shape and Near-net-shape Geometry: Die casting can create castings with precise geometries that require minimal finishes or post-processing.
8. Wide Variety of Castable Metals: A vast range of metals can be used in casting processes, expanding design possibilities.
Disadvantages
1. Lower Geometric Accuracy and Surface Finish: Casting processes, like sand casting, may need to provide better geometric accuracy and surface finish, necessitating further machining to meet desired specifications.
2. Casting Defects: Casting can introduce defects such as blowholes and porosity, which might negatively impact durability, appearance, and functionality.
3. Unsuitable for Certain Parts: Some metal parts, like crane hooks and crankshafts, may not benefit from casting due to the unfavorable grain structure. Forging is preferable for these components, as it offers better grain flow direction.
4. Reactivity with Oxygen: Metals that are highly reactive with oxygen may require casting in controlled or inert atmospheres, adding complexity to the casting process.
5. Environmental and Safety Hazards: Many casting processes can be hazardous and not eco-friendly, posing potential risks to workers and the environment.
6. Inferior Mechanical Properties: The mechanical properties of castings may be inferior to those created through forging processes.
Applications of Metal Castings
Metal castings are found in virtually every industry. Here are some to list:
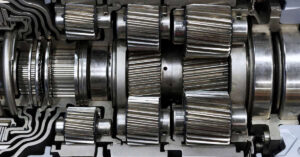
1. Machine Tools: Castings are often used to construct machine tool components such as lathe beds, drilling machine bases and columns, and milling and boring machine parts.
2. Automotive Industry: Engine bodies, covers, wheel rims, fuel injection parts, chassis components, and other parts of vehicles are made from metal castings.
3. Electric Motors: Electric motor bodies, both large and small, are made from castings.
4. Turbines: Turbine components like impellers are also made from castings.
5. Aerospace Industry: Aluminum, stainless steel, nickel alloys, and other metal castings are widely used in aerospace applications.
6. Home Appliances: Metal castings are found in various home appliances such as washing machines and food processors.
7. Shipbuilding, Railway, and Other Industries: Cast components are used in shipbuilding, rail coach manufacturing, textile machinery, and numerous other applications.
Wrapping Up
In conclusion, metal casting, a manufacturing process employed in various industries worldwide, contributes to the production of a vast array of components and products.
Understanding and optimizing metal casting techniques and conditions are crucial in achieving consistent and high-quality products. As the demand for complex castings and lightweight materials grows, industry professionals must stay abreast of emerging trends, innovations, and research to maintain a competitive advantage.
Finally, while the metal casting industry faces numerous challenges, it demonstrates noteworthy resilience and adaptability. As global industries transition to more sustainable and eco-friendly practices, the casting sector, too, will need to prioritize green initiatives and minimize waste.
Related Article: How To Weld Cast Iron? Can You Weld it?