Stick welding technique is a widely used arc welding process both indoors and outdoors. The versatility of stick welding makes it suitable for structural welding as well as welding various types of metals such as low and medium-carbon steel, stainless steel, aluminum, and more.
Whether you are a professional welder or a beginner, mastering the stick welding technique is crucial. We’ll guide you through everything you need to know – from selecting the right welding equipment and electrodes to preparing the metal surface, striking the arc, and manipulating the electrode to create a lasting and durable weld.
What is Shield Metal Arc Welding [SMAW] or Stick Welding?
Stick welding is also known as Shielded Metal Arc Welding (SMAW) and Manual Metal Arc (MMA) welding. However, it is popularly known as stick welding among welders.
Stick welding is an arc welding process that works on AC or DC, and a consumable flux-coated electrode is used to strike the arc between the electrode and the base metal to create a weld pool.
Stick welding is normally used for welding ferrous metals like iron, steel, and stainless steel, but you can also use it for welding nonferrous metals like aluminum. Using special electrodes, you can weld dissimilar metals like stainless steel and mild steel.
Stick welding is a versatile process and is highly useful for construction, maintenance, repair, and outdoor fabrication.
For more on stick welding, please review our article: ‘Shielded Metal Arc Welding (SMAW) – Stick Welding Guide‘.
How Does Stick Welding Work?
When you connect the electrode holder and the base metal to the negative and positive terminals of the power source and momentarily touch the electrode tip to the base metal, an electric arc is formed in the gap between the tip of the electrode and the base metal. The arc is formed since the current flows across the air gap and into the grounded base metal.
The high temperature of the arc melts the electrode and the welding surfaces of the base metal to create a molten weld pool. The molten weld pool fuses with the base metals and becomes a weld bead on cooling.
The metal core of the electrode has a composition compatible with the base metal. The flux coating on the electrode melts along with the core and forms shielding gasses to protect the molten weld pool and the arc from the oxygen, hydrogen, and nitrogen contained in the atmospheric air.
The molten flux solidifies into a protective slag on the weld joint/weld bead to protect it from contaminants and control its cooling rate.
After welding, you can chip off the slag and clean it with a wire brush. If you are doing multi-pass welding, the previous weld bead should be thoroughly cleaned before starting the next pass.

When the electrode becomes short, you must discard it and take a new one. The interruption due to changing the electrode and chipping off the slag makes the process of stick welding slow.
Stick Welding Electrodes
The electrodes used in stick welding can be of three types:
- A fast-fill electrode: Melts and fills quickly, and you can weld faster.
- A fast-freeze electrode: Solidifies quickly, and you can use them for out-of-position welding (vertical, horizontal, and overhead).
- A fill-freeze electrode: Has characteristics between fast-fill and fast-freeze electrodes.
The numbering system established by AWS (American Welding Society) helps identify different types of electrodes easily. A stick welding electrode normally has a five digits code to establish its identity; however, some electrodes may have more than five digits to convey additional information.
The standard five-digit identification can be represented by: E XX X X.
Let us consider an example electrode: E 7018
E indicates this is a stick welding electrode.
The first two digits (XX) or 70 indicates minimum ultimate tensile strength in thousand PSI; in our example, 70 indicates 70,000 PSI.
The third digit (X) or “1” in our example indicates this is an all-position welding rod.
** If the number is 2, it indicates only flat and horizontal positions; if the number is 3, it indicates only a flat position.
The fourth digit (X) or “8” in our example indicates the type of flux coating and the type of current ‘low hydrogen Potassium, Iron powder flux coating and the current is AC, DCEP, or DCEN’.
For More Details, Read our Article: Welding Electrodes – Types & Selection of Welding Rods
The electrode has a metal core (wire) in the center covered by a thick flux coating. The composition of the metal core is selected based on the composition of the base metal (being welded), and normally the chemical composition of the metal core will be superior to that of the base metal.
The contents of the flux coating are aimed at protecting the weld pool, and it can also contain metal to improve the weld deposition rate. The flux burns to consume oxygen (forms carbon dioxide) and protects the molten weld pool from oxygen, hydrogen, and nitrogen in the air.
The coating contributes to good arc initiation, easy restrikes, puddle control, and a stable arc with minimal spatter. The molten flux forms a protective slag on the weld bead to protect it from contaminants and slow its cooling rate.
The electrodes are available in different sizes, such as 3/32ʺ, 1/8ʺ, 5/32ʺ, 3/16ʺ, etc. The size indicates the diameter of the metal core of the electrode.
Some of the Popular Electrodes are:
E6010: E6010 is a mild steel welding electrode; 60 indicates the minimum ultimate tensile strength as 60,000 PSI, 1 indicates this is an all-position electrode, and the last digit’ 0′ indicates high cellulose sodium flux coating and the type of current is DCEP.
E6011: E6011 is a mild steel welding electrode; 60 indicates the minimum ultimate tensile strength as 60,000 PSI, 1 indicates this is an all-position electrode, and the last digit ‘1’ indicates high cellulose potassium flux coating and the type of current is AC and DC.
E7014: E7014 is a mild and low carbon steel welding electrode; 70 indicates the minimum ultimate tensile strength as 70,000 PSI, 1 indicates this is an all-position electrode, and the last digit ‘4’ indicates iron powder Titania (Rutile) flux coating and the type of current is AC and DC.
E7018: E7018 is a mild and low carbon steel welding electrode; 70 indicates the minimum ultimate tensile strength as 70,000 PSI, 1 indicates this is an all-position electrode, and the last digit ‘8’ indicates low hydrogen potassium, iron powder flux coating and the type of current is AC and DC.
It is mandatory to use a drying oven for E7018, and it is stored in a cabinet maintained at 250° F to 300° F. E7018 is good for structural welding.
Note: Special electrodes are used for welding other and dissimilar metals (like stainless steel to mild steel), stainless steel, aluminum, etc.
Related Article: A Guide to 6010, 6011, 6013, and 7018 Welding Rods
Storage of Electrodes
The stick welding electrodes have flux coating that can absorb atmospheric moisture. When you open the electrode box, normal electrodes can be transferred to an air-tight container. It is not mandatory to store these electrodes in a warm cabinet.
However, the low hydrogen type electrode has to be moisture free, and you have to follow the recommended storage directions of the manufacturer. A drying oven is a must for low hydrogen electrodes.
Stick Welding Machine and Equipment
The equipment required for Stick welding is simple. They are:
- A constant high current power source (50 to 300 amperes and 10 to 50 volts).
- A good electrode holder for holding the electrode.
- A ground clamp or work clamp for connecting the base metal to the power source.
- Welding safety gear for the welder.
- Welder’s tools such as chipping hammer, wire brush, etc.

Current Used
Stick welding can be done by using AC (Alternating Current), DCEN (Direct Current Electrode Negative) “or Straight Polarity“, and DCEP (Direct Current Electrode Positive) “or Reverse Polarity“, but the type of current to be used depends on the electrode selected by you.
The AWS (American Welding Society) code number of the electrode you selected will tell the current type to be used.
The DCEN or Straight Polarity places more heat at the electrode end, resulting in a higher rate of electrode melting (higher weld metal deposition) and low weld depth (low penetration).
The DCEP or Reverse Polarity places more heat at the base metal end, resulting in deeper weld penetration.
Stick welding with an AC stick ensures good heat distribution between the electrode and the base metal; the result is a balance between weld metal deposition and penetration.
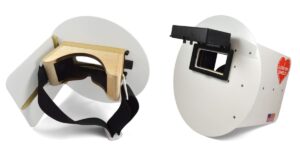
Safety Equipment
Stick welding deals with electric current and welding arc, and the welder should select a well-ventilated area for welding and wear safety gear. The safety gear includes a good-quality welding helmet, leather apron, gloves, and boots.
How to Weld with a Stick Welder?
Experienced welders easily do stick welding and produce great weld beads. Many aspiring welding professionals learning welding or DIY enthusiasts think stick welding is difficult to master.
However, if you learn the basic techniques of stick welding, such as, setting the current (amperes), maintaining the length of the arc, angle of travel (working angle of the electrode), manipulation of the electrode, and speed of travel (welding speed), you can slowly master stick welding.
This is also called CLAMS (C- Current setting, L- Length of arc, A- Angle of travel (working angle of the electrode), M- Manipulation of electrode, and S- Speed of electrode travel). ‘CLAMS’ is better known as the secret to good stick welding.
Before discussing ‘CLAMS’, let us talk about preparing the base metals for welding and your posture during welding.
What Do You Need Before You Start Stick Welding?
1. Preparation of the Base Metals for Welding
Preparing the base metals for welding is important for any welding process. The stick welding process has a higher tolerance to contaminants like dirt or rust on the welding surfaces than other arc welding processes.
With clean metal, you can enjoy faster travel speed as you weld. Also, a clean welding surface produces quality weld beads.
To ensure the welding area is clean, use a wire brush to remove dirt and grime from the welding surface. And use an angle grinder to remove the scale and rust. Also, create a clean spot for the work clamp for a good electrical connection. Wipe the welding surface clean.
Welding surfaces with contaminants can cause cracks, porosity, inclusions, or insufficient fusion.
2. Select Your Posture for Doing the Stick Welding
Keep your head off to the side and out of the weld fumes for the best view. This view ensures you’re welding in the joint and keeping the arc on the leading edge of the puddle.
Make sure your stance allows you to support and manipulate the electrode comfortably. You should have sufficient elbow room to manipulate the electrode conveniently.
‘CLAMS’ for Better Stick Welding
Current Setting (C)
The current required for welding depends on the electrode’s diameter, the thickness of the base metals to be welded, and the welding position.
Thinner base metals require lesser diameter electrodes and less current, and thicker base metals require higher diameter electrodes and more current. Also, the current setting for out-of-position welding will be 10 to 15% less than flat-position welding.
The electrode you have selected for the job will tell you the type of current to be used (AC or DC) and the polarity. The amperage setting depends on the electrode size, and you can find the operating amperage range suggested by the manufacturer printed on its box.
The suggested amperes will be a range (minimum and maximum). You can set the amperes at the minimum value and then increase it by small increments of 5 amperes till you find the optimum amperes for your welding and technique.
Some welders suggest setting the ampere at the mid value of the range and then reducing or increasing the ampere in increments of 5 amperes after analyzing the actual situation.
The amperage setting decides the amount of current flowing through the welding electrode and the heat generated. The amperage required for welding increases with the diameter of the welding rod, and a higher diameter electrode needs a higher ampere (it is very obvious since a higher diameter electrode needs more heat to melt).
If you do not have the electrode box for reference, follow the thumb rule. The general thumb rule of expert welders is 1 ampere per 0.001 inch of electrode diameter for flat welding, and the amperes used are up to 15% less when you are welding in an overhead position.
This means the ampere required for flat welding with a 1/8ʺ electrode is 125 amperes. Set the welding current to 125 amperes and then increase/decrease it by small increments of 5 amperes till you find the optimum amperes for your welding and technique.
Signs of Very Low Ampere Setting
- The electrode will be sticky, making it hard to strike an arc without sticking on your metal.
- The welding arc will be unstable (stutter) and can go off when you try to maintain the correct arc length.
- The weld bead looks narrow and ugly with low fusion.
Signs of Very High Ampere Setting
- Uncontrollable molten weld puddle leads to the problem of the undercut.
- The arc sound louder.
- The electrode becomes red hot over its length.
- The flux coating starts coming off.
- When the amperage is set too high, there is an increase in spatter.
Length of Arc (L)
The arc length is the distance between the tip of the electrode and the weld puddle, and the optimum length of the arc is equal to the core diameter of the electrode. Since the electrode keeps burning off, you need to bring the electrode nearer to the weld puddle to maintain the arc length. If you use a 1/8ʺ electrode, the optimum arc length is 1/8ʺ.

If you are holding the electrode tip too close to the weld joint, the result can be a reduced welding voltage, erratic arc, chances of the arc going off, electrode sticking to the base metal, and a narrow high crown weld bead.
A too-long arc length can cause high spatter, increased welding voltage, reduced weld deposition rate, undercut, etc.
A new welder may try to increase the arc length so that they can have a clear view of the molten weld puddle. But I’m afraid that’s not right. Instead of increasing the arc length, you can change your sitting/standing position and head position to have a clear view of the weld puddle while maintaining the optimum arc length.
An optimum, tight arc length will give you a nice-looking narrow weld bead with minimum spatter. You can learn this technique with a little bit of practice.
You can achieve the best welding results by maintaining a short arc and uniform electrode travel speed. Also, you should move the electrode downwards at a constant rate as it melts (to keep up the short arc).
The Angle of Travel (A)
When you are stick welding in flat, horizontal, and overhead positions, you normally adopt a backhand or drag welding technique.
Backhand welding (also called pull or drag welding) is a welding technique where you work by moving the electrode from left to right and typically inclining the electrode towards the right by an angle of up to 15°.
The inclination of the electrode helps add the filler metal from your left side. You can hold the electrode perpendicular to the joint and tilt it towards the direction of travel (towards the right when welding left to right) at an approximate angle of 5° to 15°.

When you are stick welding vertically up, follow a forehand or push welding technique, and tilt the welding rod away from the direction of weld travel by an approximate angle of up to 15°.
Manipulation of the Electrode (M)
Manipulating electrodes depends on individual welders, and you can find your way or style of doing it to achieve the best possible results. You can develop your style but should follow some basics.
When you are welding thin base metals (1/4ʺ or less), there is no necessity for a weave pattern weld bead. Instead, you may go for a straight weld bead.
On the other hand, welding thicker base metals need wider and thicker weld beads, and you can go for semicircular overlapping weld beads by weaving the weld bead from side to side movements (the weld bead looks like a series of silver dimes placed overlapping each other).
The maximum side-to-side movement of the electrode can be up to twice the electrode’s core diameter and multiple passes can be used to cover a wider area.
When doing vertical up welding, move steadily and follow a welding speed to allow enough time for the weld metal to fill the joint. Remember to select a welding electrode recommended for vertical welding.
Speed of Travel (S)
Speed of travel is the rate at which you move the electrode over the length of the weld. Your travel speed should be such that the weld puddle size should be uniform throughout the weld length.

First, create a weld puddle of the required diameter, then maintain a welding speed to keep the puddle size the same. A too-fast travel speed may result in a shallow weld and a narrow weld bead with a highly crowned head (which may also lead to low penetration and underfill/undercut).

And a very slow speed of travel will give you a wide, convex weld bead with shallow penetration (cold-lapping (low fusion with base metal) is another possibility). Too slow a travel speed can divert the focus of heat into the weld puddle instead of the base metal.

A Step-By-Step of How to Weld with a Stick Welder (Stick Welding Technique)
First Step
Select a well-ventilated area and a table fabricated with steel for convenient work. Have some scrap mild steel pieces of 3/16ʺ or 1/4ʺ thickness for trial and practice welding. Arrange the welding set for stick welding.
Second Step
Prepare the edges of the two metal pieces (called base metals) for the weld groove to provide good penetration and space for the weld metal to fill up.
You can use a machine file or a grinder to do this. Clean the welding surfaces to remove scale, rust, and contaminants. A good welding surface will give you a defect-free weld bead.
Third Step
Create a clean spot for the ground clamp. Attach the stick holder and ground clamp to the larger base metal at the clean spot.
Fourth Step
Select the type and size of electrode suitable for the base metal. Remember that the diameter of the electrode can be equal to or less than the thickness of the base metal. But you should never select an electrode size that is higher than the thickness of the base metal.
Note down the recommended type of current and the recommended ampere range for the selected electrode.
For example, if you have selected a 1/8ʺ E7014 electrode, then the recommended current is DCEP, AC, or DCEN. And the recommended ampere range is 120 to 145. Set up the welding machine to the required current type and polarity.
You can start with the current at a lower range and then increase it in increments of 5 to 10 amperes till you get an optimum result (or you can start at the mid-range (132 amperes) and then decrease/increase the amperes in increments of 5).
Fifth Step
Start the welder (welding machine), and you will hear the humming sound of the transformer.
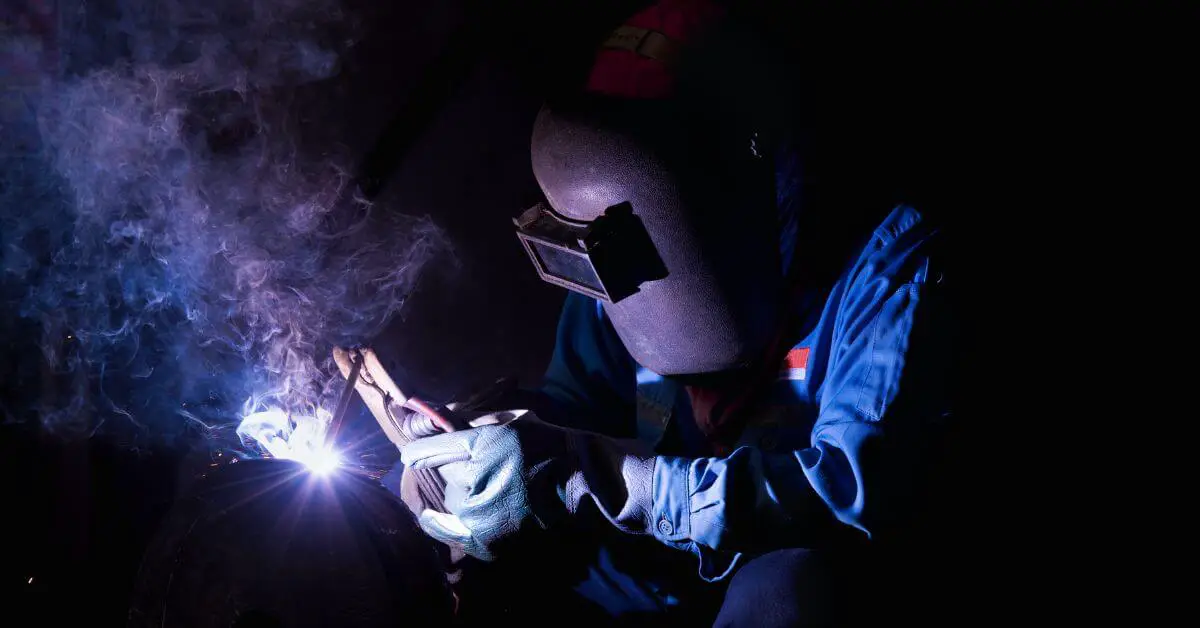
You can momentarily flip open your helmet to position the electrode nearer to the welding line but immediately pull the helmet down. It would be best never to view the arc with your bare eyes since it can seriously harm your eyes.
Sixth Step
Select the welding you want to do (backhand or forehand technique). Use your dominant hand to hold the insulated part of the electrode holder (the right-hand people use the right hand and vice versa).
How to start the arc: Drag the electrode tip across the base metal surface (like you strike a match). The touching of the electrode to the base metal makes the current flow through. Lift the electrode tip immediately, and the arc will form.
Once you start the arc, maintaining it is the most important thing now. The best way to maintain arc consistency is to hold the stick electrode at a steady distance from your workpiece. Generally, you need to hold it at about 3mm off your piece to get a good arc.
The arc will go off if you lift the stick electrode too high. The electrode can stick to the base metal if you delay lifting it.
Seventh Step
Do one or more trial welding on a plane metal surface for practice. Once you are confident, take up the welding to join two base metals.
Eighth Step
Start the welding from one end and continue on the weld line till you complete the welding. You can interrupt in between to change over to a new electrode. That is if the weld length requires more than one electrode. Maintain the correct arc gap.
As you move along the welding line, the electrode will melt and fills up the weld groove. And the molten flux forms a slag to cover the weld metal.
This step needs to be practiced to master it. Maintain an optimum weld speed and proper arc length, and move along the weld line. Beginners may experience electrodes sticking to the base metal or clamp during welding. It is okay to break the electrode free by jerking the electrode holder and repeatedly striking the arc to continue.
Ninth Step
Once the welding is completed, use the chipping hammer to chip off the slag. And clean the weld bead with a wire brush to remove foreign particles. The weld bead may need secondary operations based on the welded part.
Advantages of Stick Welding
Stick welding offers several advantages that make it an attractive welding method for a variety of situations:
1. Versatility: This welding process is suitable for a wide range of materials, including steel, aluminum, and cast iron.
2. Portability: Stick welding can be performed in outdoor environments and remote locations without requiring a power source (Using Engine-Driven Welders).
3. Cost-effectiveness: With minimal equipment needed and a low cost for electrode rods, stick welding is an economical choice for many projects.
4. Ease of use: The electrode rods are easy to store, transport, and replace.
5. No shielding gas required: Unlike MIG and TIG welding, stick welding does not necessitate shielding gas or access to gas cylinders.
Disadvantages of Stick Welding
Despite its numerous advantages, Stick welding has its share of disadvantages that should be considered:
1. Unsuitable for thin materials: Stick welding is not ideal for welding thin materials. As it may cause warping or distortion of the metal.
2. Learning curve: This welding process can be challenging, particularly for beginners. In comparison to MIG welding, mastering stick welding requires a significant amount of practice.
3. Smoke and fumes: Stick welding produces considerable smoke and fumes. And it can potentially harm the welder if proper protective gear is not used.
4. Lower-quality welds: There are better options than stick welding for high-quality welds. As it is prone to creating splatter and slag, which can require substantial cleanup after welding.
Conclusion
Mastering how to weld with a Stick Welder is a crucial skill that every proficient welder should acquire, similar to MIG and TIG welding techniques.
We trust that this information has benefited you. Whether you’re a seasoned professional or an aspiring welder looking to develop essential welding skills.
References